The Down and Dirty Brewschool Guide to Homebrewing
Oh now you’ve done it. You got yourself a homebrew kit.
Either as a gift or a misguided purchase, here we are. Might as well make the best of it right? By golly let’s turn that kit into beer!
But you have no idea what you’re doing.
You’ve tried to follow along with your brewing friends as they talk about racking and fermenting and worts. Huh? But the beers they keep handing you taste good. Real good. And that is how we got here, with a beer kit and no idea where to go.
Never fear, this down and dirty guide will get you familiar with the brewing process from brew day to bottling day. We will offer suggestions and information the whole way.
Now get to it, this beer won’t make itself.
Brew Day
So it’s brew day. We’re getting the ball rolling. A one way ticket to home brewing. Just breathe, it’s so much easier than it looks.
But just like an Ikea couch, we need to make sure we have all the parts and pieces. The ingredients. You should have grain, or malt extracts, and hops for flavor and bittering and last you’ll have yeast that makes the magic happen.
With your ingredients sorted do a quick run down of the recipe.
Like baking or making a special dinner for your date, perusing the recipe will give you an idea of what is coming up. Look at timings, when to add the ingredients and prepare for what you’ll be doing.
Brewing is basically boiling water, adding sugar and fermenting it. And being patient. That’s the hardest part.
Collect your equipment and let’s get wet.
Cleaning and sanitizing.
As you can tell from other home brewing guides, and our own, cleaning and sanitizing is the most important part of the brewing process.
So that is what we do first. And we do it often.
Clean everything. Clean the kettle, clean the carboys and fermenters and clean all the tools like thermometers and measuring cups and everything else you will be using today. Cleaning is just the first step, but vitally important. Cleaning the equipment removes debris and junk that could harbor microrganisms that might ruin a good batch of your first beer. Don’t ruin your first batch of beer, it could sour (link to sour story) you from brewing. Get it? Sour? Ahh…you will.
Next we sanitize! While cleaning removed debris, sanitization removes anything living that could hurt or ruin our batch. We need to be thorough and if in doubt, sanitize again.
Beer is a living and breathing animal until we pour it down our throats so we need to treat it with care. Feed it the wrong stuff and it turns into a monster.
Boil
Oh it’s happening now..you’re making beer.
Ok really you’re just boiling water, but this is how it starts.
Fill the kettle with enough water to match the recipe. Sometimes it is a gallon, others it is more. And boil it. You got this.
Once your water is a rollin’ we add our extracts. Most beginner kits will use malt extracts but for the fancy brewer all-grain is the way to go.
Extracts come in either liquid form, which is basically a super thick syrup, or a dried form. Be careful with the dried form because it is so thirsty that any moisture, even a humid day, can cause it to start to clump.
Add the extract into your boiling water and stir, taking extra care to turn the burner off before adding the extract so it doesn’t scorch. Get that goo to dissolve and bring it back to a boil.
The official boil time doesn’t start until the extract and other ingredients have fully dissolved and the liquid has returned to boiling.
Your recipe will tell you how long to boil this concoction. Sometimes it is as short as 30 minutes but it can be longer depending on the beer. Sit and watch. Watch that water boil!
Adding hops.
Now that we’re boiling again, this is the time to add the good stuff. Add your hops for bittering and any other flavor additives. Do as the recipe says!
This is chemistry, like baking, and if it isn’t almost nearly exactly right you’ll have a mess. And in this business a mess means crappy beer.
When adding the hops or other ingredients take notice of the time. Usually this is dictated in time left to boil. Your recipe will tell you how long to boil the grain, and when you reach the time designated, that is when you add your hops. Or other stuff. Like punkin.
While we’re waiting, have you sanitized everything? We mean everything. Yeah? Good.
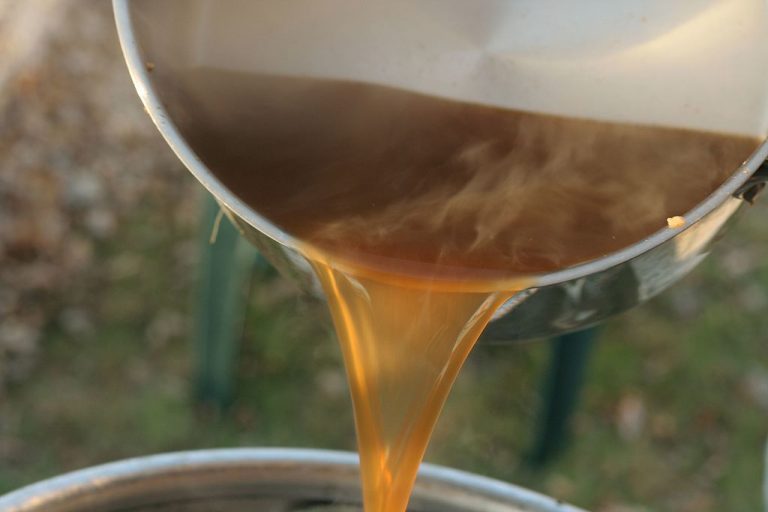
Wort
And here we are. We made beer.
Ok, this is really just the wort. It is the unfermented form of beer and you’ve done a hell of a job getting this far.
Let it cool for a few minutes and fill your sanitized fermenter with some cold water. Halfway should do but make sure you take note of how much your boil was. You don’t want to overflow this bad boy.
Pour the wort into the fermenter and top it off with cold water. A typical batch of homebrew is around five gallons. A glass fermenter is fragile so let the wort cool a bit more to prevent shattering.
The easiest way to cool off the wort before adding it to the fermenter is to use an ice bath. This is how most homebrewers start.
Of course if you are Mr. Moneybags, you can invest in a wort chiller. Check out our rundown on wort chillers if you fancy a quick way to cool down your brew. Why bother? The faster you cool it down, the clearer your beer. And you don’t have to worry about bacteria getting freaky with your beer.
Once the wort has cooled we transfer it.
Pitching Yeast
Here’s where we have fun.
Adding the yeast is what munches on the sugar that is formed when the grain is boiled. Then the yeast burps up gas and turns our wort into beer. Beeeeeer.
There is a whole mess of things the more advanced brewer can do at this stage but for now we just want to cool it down and get it going. Do we need to remind you to sanitize everything before hand? We didn’t think so.
Be sure not to fry your yeast. Follow the instructions to make sure the yeast is activated at the right temperature. Too cool and it…well won’t do much. Too hot and you kill it. Murderer.
Slap the lid on and put a sanitized airlock and bung, give it a good vigorous shake to mix it all up and wait. Wait for that good beer.
Fermentation
It will typically take 12-72 hours before the yeast starts cranking away at the sugars. Once it does you will notice the bubbling coming out of the airlock.
We should mention something here that freaks most new homebrewers out. Just because your airlock stops bubbling doesn’t mean you did anything wrong. Calm down kimosabe, your beer is all good.
Following the recipe is the best indicator on when fermentation is done, but the definitive way to know is using a hydrometer. It takes a little science to use one, so use our guide to learn how.
Priming Sugar
Whoa now, it took us around three weeks to get this far.
You stored your fermenting beer in the darkest closet or corner of your basement. It’s time.
Priming sugar is what we throw in the bottles to get to carbonization. Gotta get them bubbles right?
Boil some more water, put in the amount of sugar as required the recipe and boil it until dissolved. Ten minutes seems to be the magic number. Always follow the recipe! Then prep your bottling bucket.
Your sanitized bottling bucket.
Pour in the sugar once it has cooled a bit, then transfer your fermented goodness from the fermenter to the bottling bucket. You can do all sorts of magic tricks to do this such as a automatic siphon.
As you are transferring the beer, take care not to let the solids that have settled at the bottom of the fermenter find its way into bottles. It isn’t bad for you, but it makes a cloudy beer. And like all of homebrewing, there are some fun tools to keep your beer clear.
Once the liquid has been transferred its bottling time. The big leagues.
Bottling Day
Here we go, the moment we’ve been waiting week for. Putting beer into bottles so that we can drink it out of bottles later.
The priming sugar allows the yeast to crunch and munch a little bit more once it is in the bottle. This is what carbonates the beer.
Did we mention the bottles and the filler to fill the bottles need to be sanitized? We thought so.
Fill the bottles.
Using a bottle capper and brand new bottle caps top those beers off. Bottle caps are fairly cheap, you can get them here and if you need a fancy schmancy bottle capper, check these out.
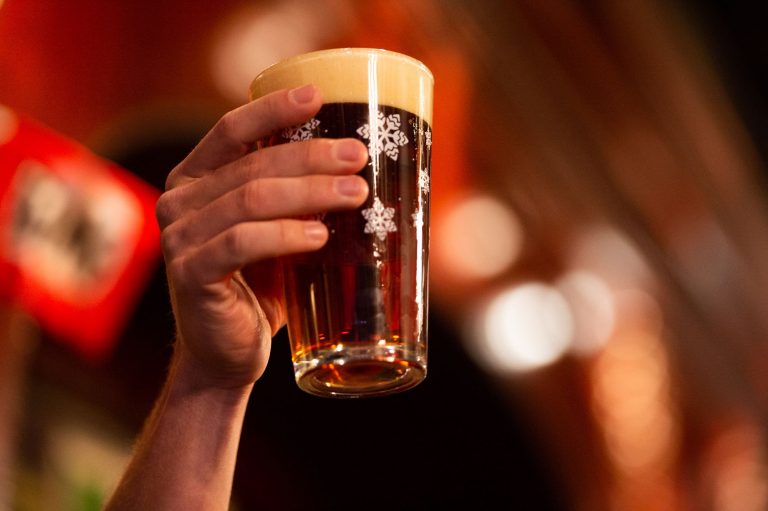
Enjoying your beer.
Oh yeah.
Two to three weeks after you bottled your fermented malt liquid that was eaten and expelled by yeast… we have beer. In bottles.
Chill it, spill it and spread the word. You’re a brewer now. A homebrewer. You made your first batch of beer, and even if it was terrible you learned and you experienced the life of a brewer. Now you need to schedule your next brew day.
From here where do you go?
The world is your oyster my friend. Follow the links below to learn even more about brewing and eventually we will be on your doorstep begging for an interview because you’ve become the newest brewer at Anytown, USA and we want your story.
We can’t wait to taste what you’ve come up with.